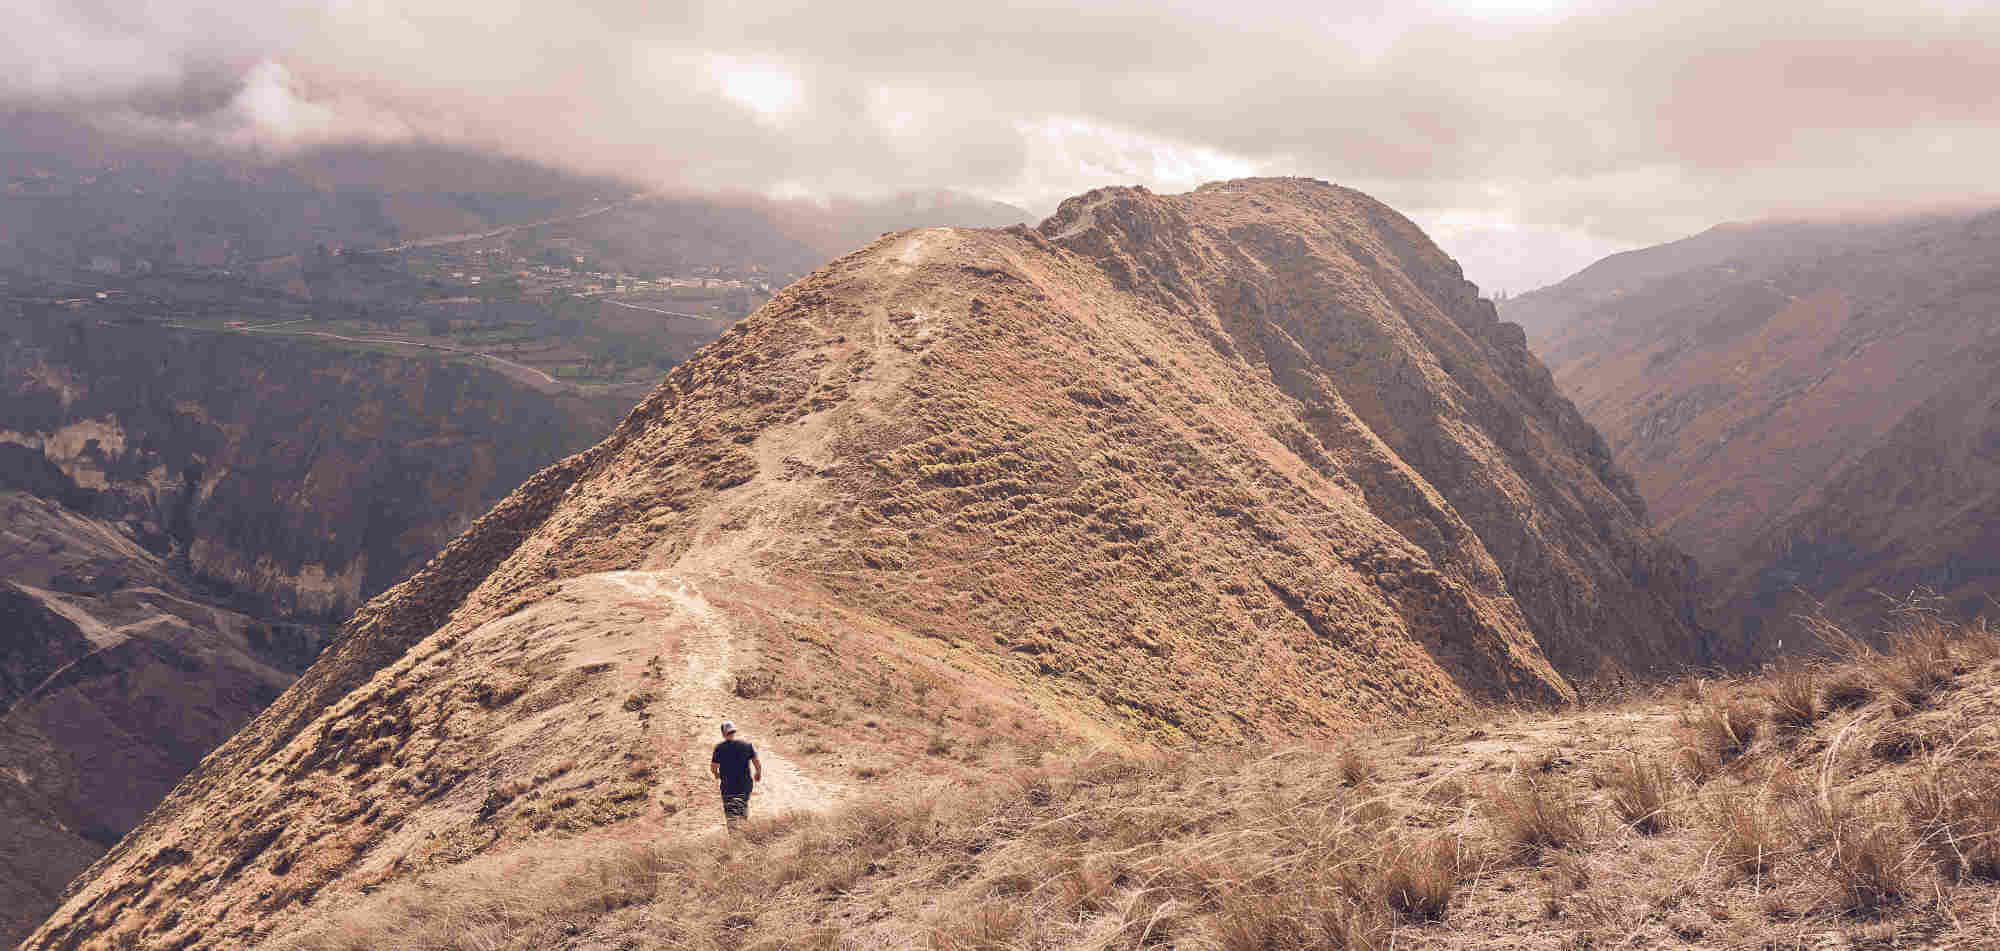
Did you know you can hike the Nariz del Diablo: you can appreciate the dramatic landscapes of this famed railroad on your own two feet.
Guide to hiking the Nariz del Diablo from Alausi:
If you’re in Alausi (or planning a trip there), you’re probably familiar with the Nariz Del Diablo (Devil’s Nose) train ride — or at the very least, you’re aware that Ecuador’s Trans-Andean railroad cuts right through the heart of this understated little town in the rural province of Chimborazo. But did you know you can also hike it?
The Nariz Del Diablo mountain was the biggest obstacle facing the construction of the Trans-Andean railroad, and cutting through it required engineering feats that were, well — devilish. Dynamite was thrown into the mountain’s deep furrows so the stubborn mountain would give way, and workers were killed. When the railroad successfully worked its way around the tall, narrow-ridged mountain and its surrounding region, the town of Alausi (home to the station) became the region’s center for commerce and trade.
The train ride definitely does the Nariz Del Diablo’s history justice. And, luckily for those who like a more off-the-beaten-path experience, you can also appreciate the dramatic landscapes of this famed railroad on your own two feet. Walking to the ridge of the mountain, and then along its backbone, is a little-known hike that you should consider. You’ll get a bird’s eye view of the surrounding landscapes and the railroad that snakes along the mountain below.
This hike is also the actual trail that was traditionally taken by indigenous farmers from the nearby town of Nizag, who would walk their produce to and from Alausi. Our suggested route takes you through this town, where you will likely run into women and children herding sheep, cows, pigs, and other working animals carrying local produce along the trail.
We created a thorough, visual guide to help you stay on track and do this beginner’s level hike easily from Community Hostel. The route remains unmarked, so we hope this helps clarify some of your questions along the way. Read our FAQs at the end if you have additional questions.
Hiking Guide
Picture 1/Step 1:
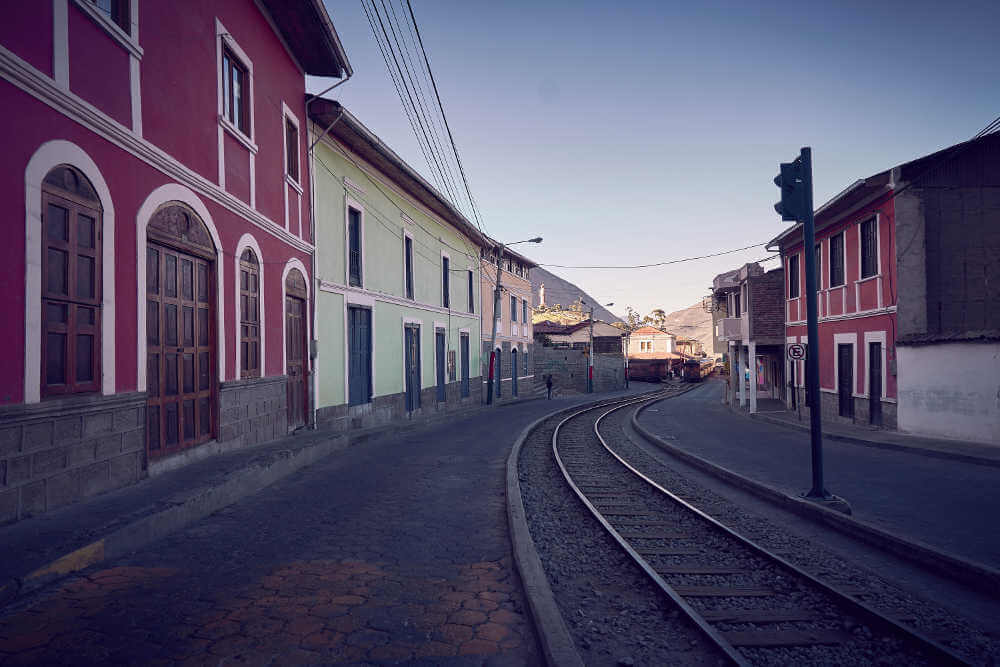
Leaving from Community Hostel Alausi, you’ll follow the railway tracks towards the train station (stay on your right). You’ll walk past the train station (it will be on your left) and shortly after passing the train station you’ll see the railway tracks diverge briefly and join again. Continue following the railway tracks.
Picture 2/Step 2:
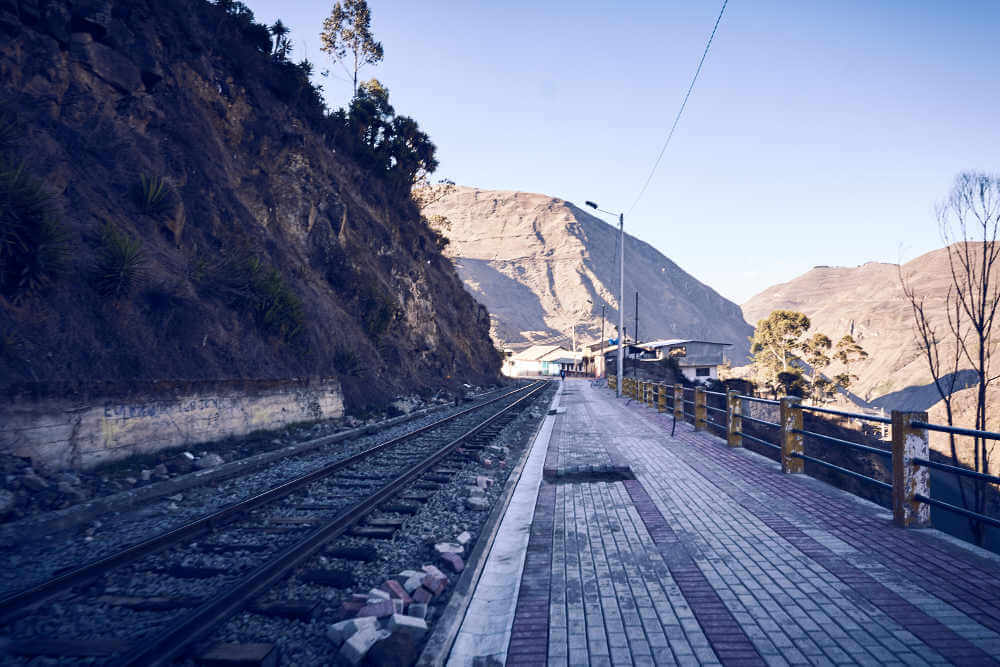
You’ll get to a straight stretch of railway tracks with a paved sidewalk to your right. Continue following the railway tracks past this and some houses at the end of this straight stretch.
Picture 3/Step 3:
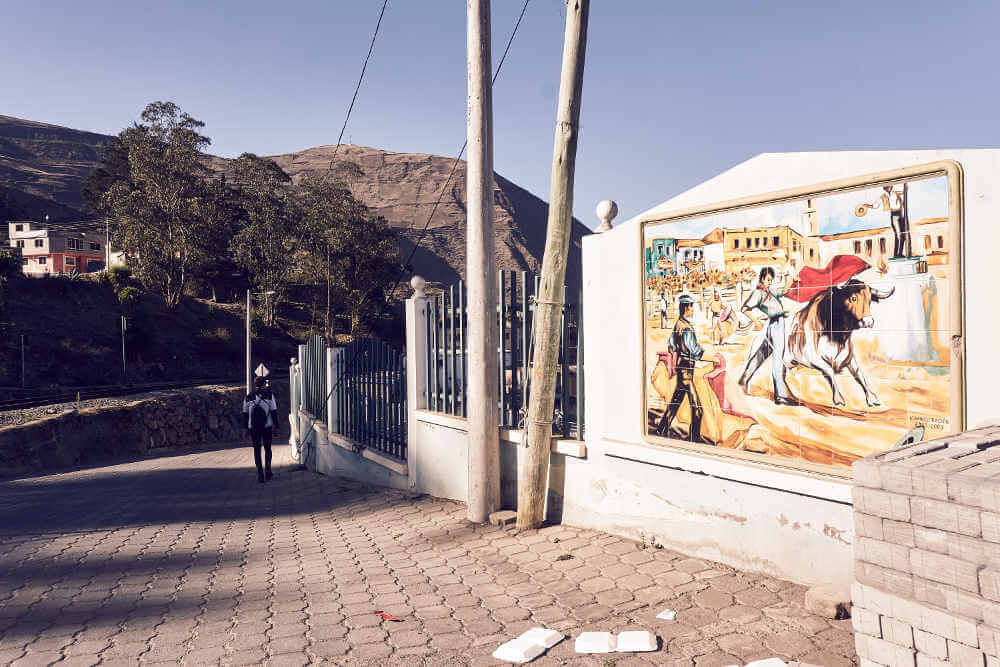
You’ll get to the Plaza de Toros (bullring), which is easily identifiable by the bull-themed art on the wall. Continue down along this wall (you’ll be on the right side of the railway tracks). You’ll lose sight of the railway tracks soon.
Picture 4/Step 4:
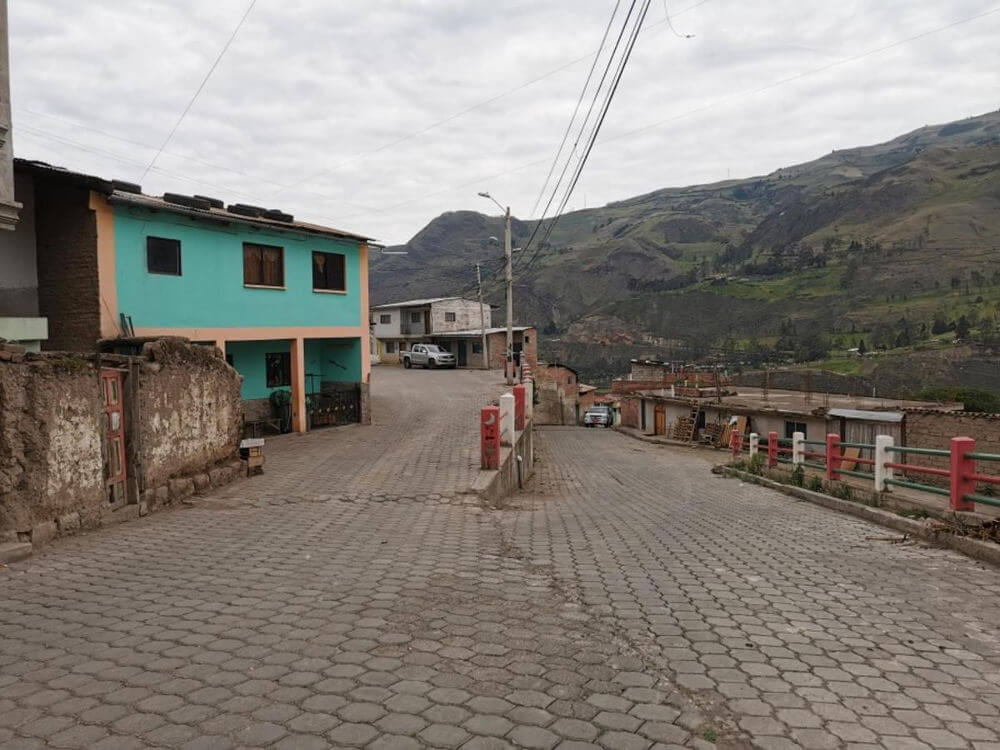
You’ll come to a point where the path divides, and you’ll take the left route (right past the green/yellow two-story house). Continue here the road.
Step 5:
You’ll walk along the road for a while (with no sight of the railway tracks still). Follow the road until you reach the railroad tracks again. You have to cross them and continue straight on the road which then narrows and becomes a trail. You’ll now start following this trail past some brush and then a brief, rocky incline.
Picture 6/Step 6:
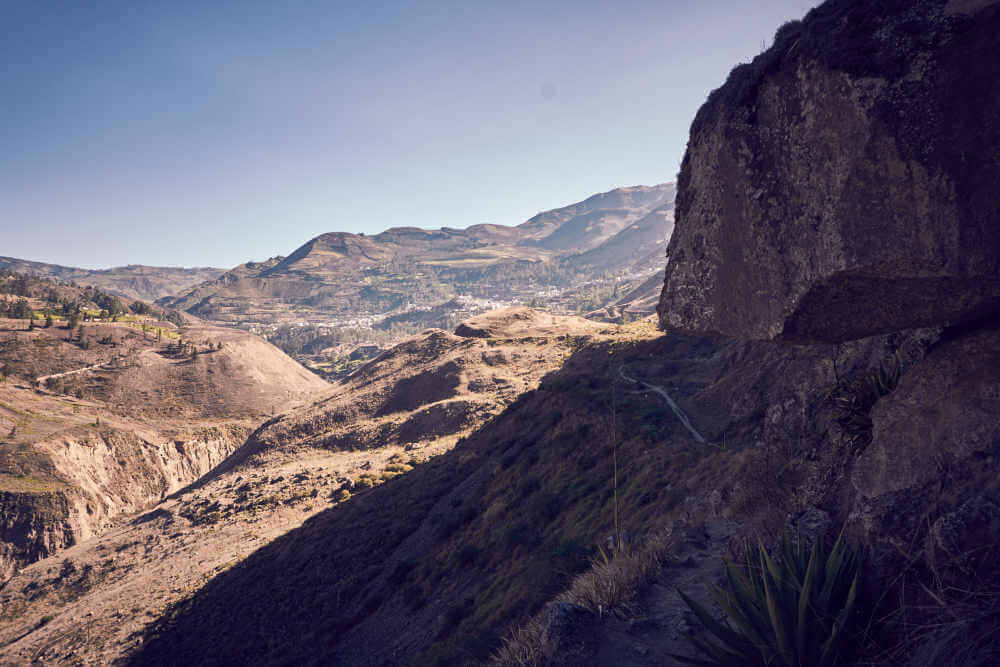
Once you’ve gone past the rocky incline, you’ll pass a pretty big boulder to your left. The boulder will tower over you, so you’ll almost walk below it. The picture here is taken looking back once you’ve passed the boulder, which is why it appears here on your right. When you look back you’ll have a view of Alausi! Keep following the trail.
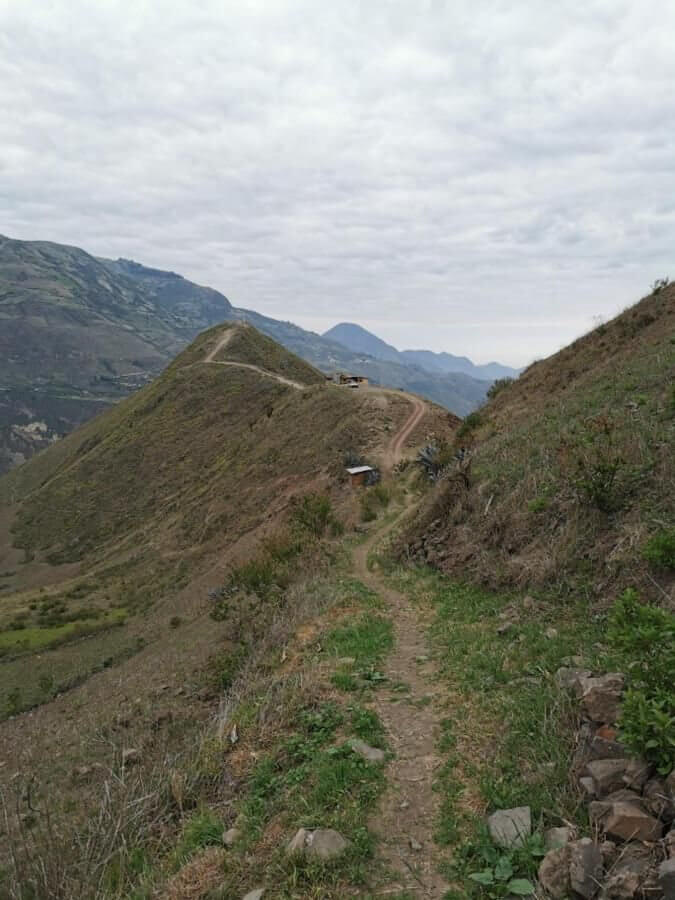
Picture 7/Step 7:
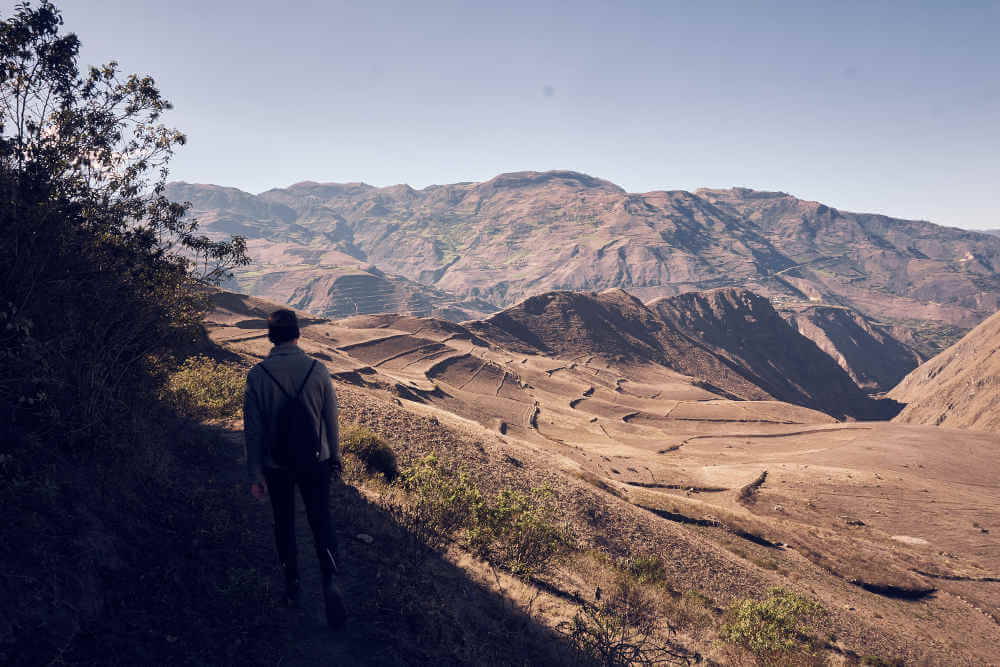
You’ll eventually have a view of the Nariz del Diablo mountain to your right. It is the lowest ridge pictured here, it is the one that looks like a really long camel’s back! This is where you’re headed.
Picture 8/Step 8:
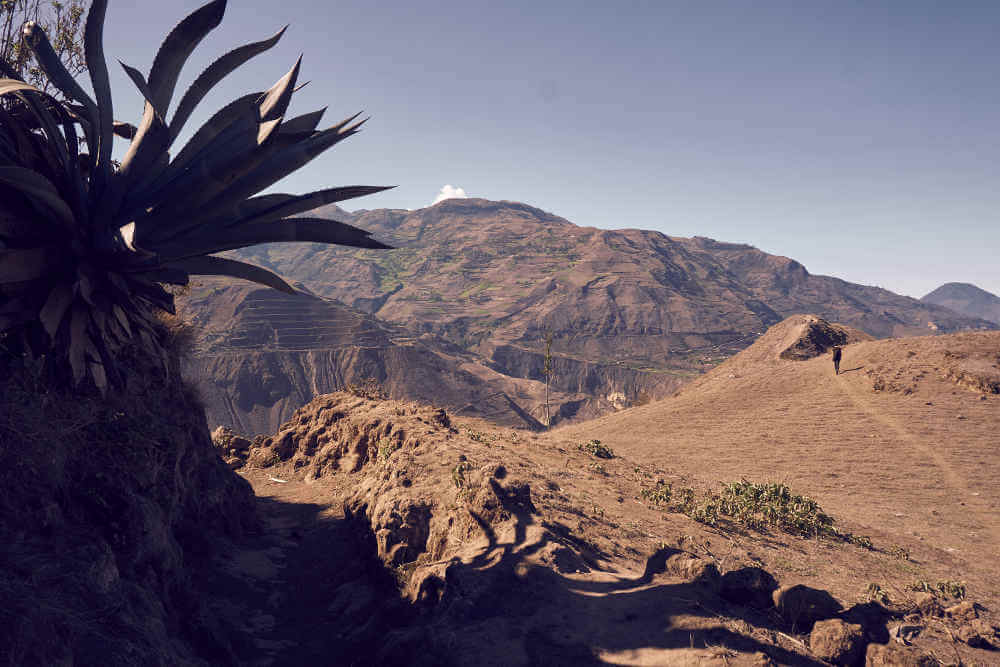
As you get closer to the mountain, there’ll be a point where a faint trail is marked to the right (pictured). It is headed straight for the mountain, so it should be easy to tell at which point to turn right (there are also two stones that mark the trail head to the right.)
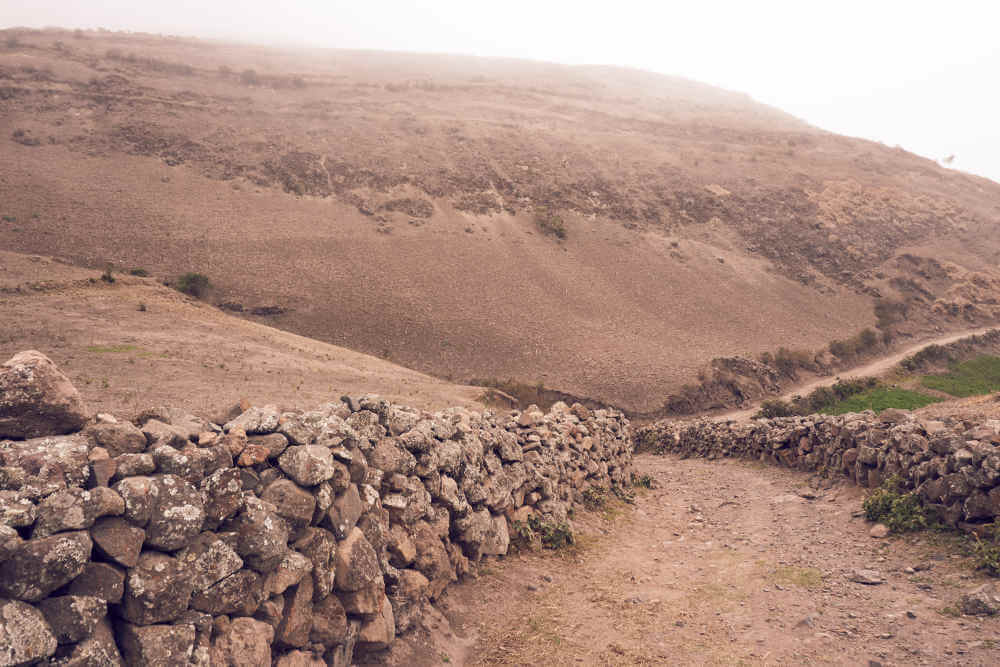
Picture 9/Step 9:
As you approach the first hump of the ridge (pictured), you’ll first have a brief descent and you’ll cross over a short rock fence/wall.
Picture 10a and 10b/Step 10:
After the rocke fence/wall you have to pay fee. The fee for visitors hiking the trail is $2:
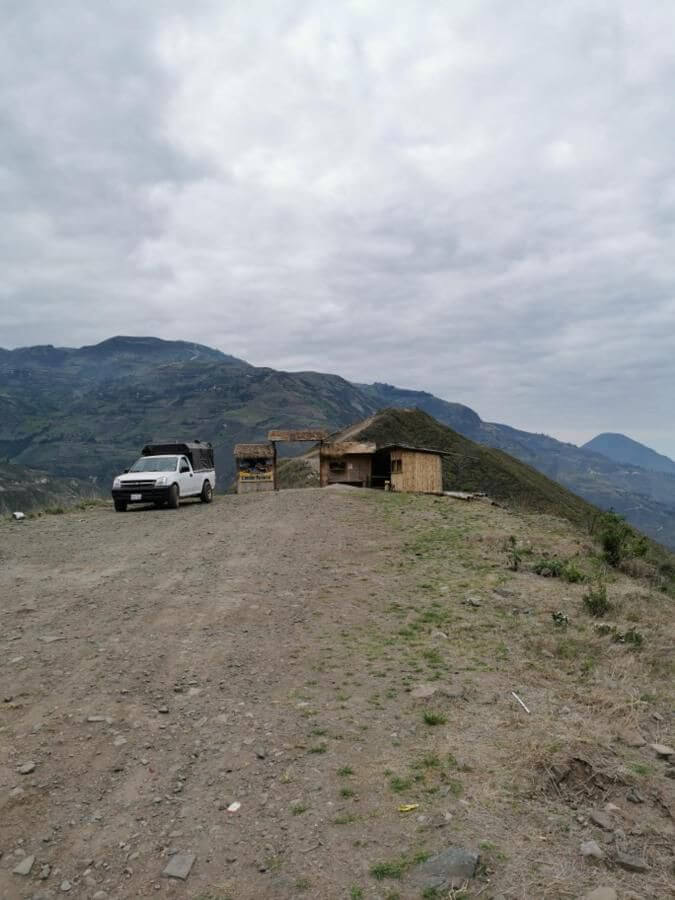
You’re now on the actual Nariz del Diablo mountain! Continue onwards.
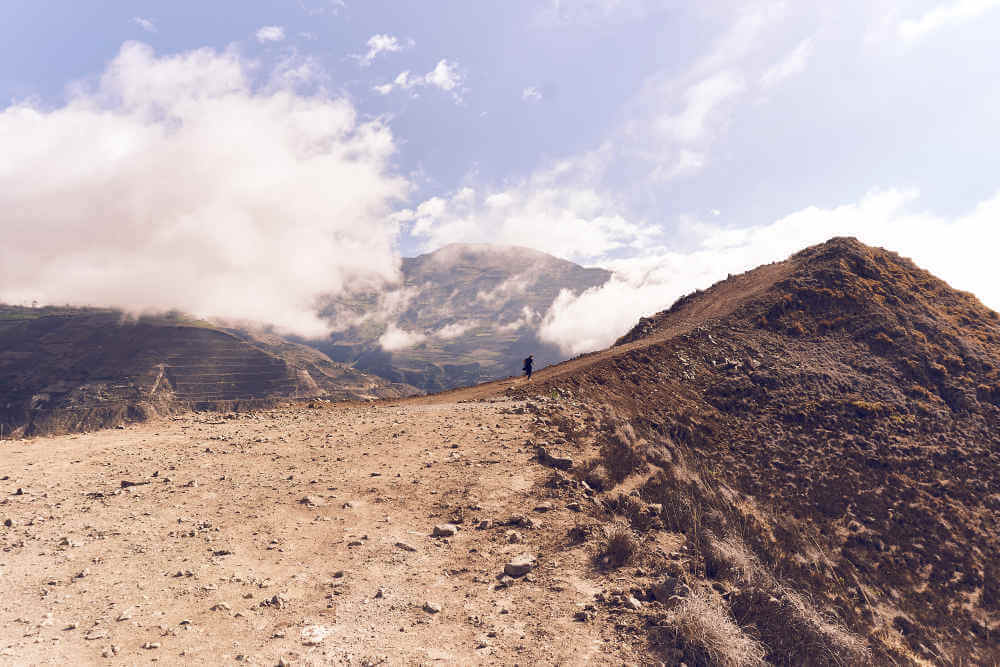
Picture 11/Step 11:
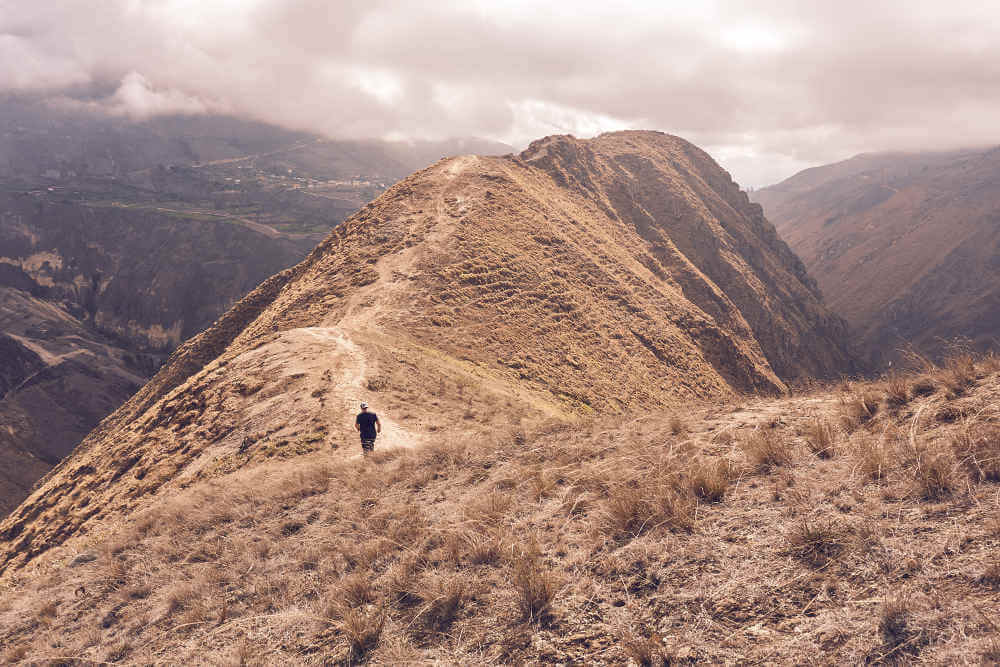
This will be your view! Continue along the entire length of the ridge as you soak in the striking landscape.
Picture 12/Step 12:
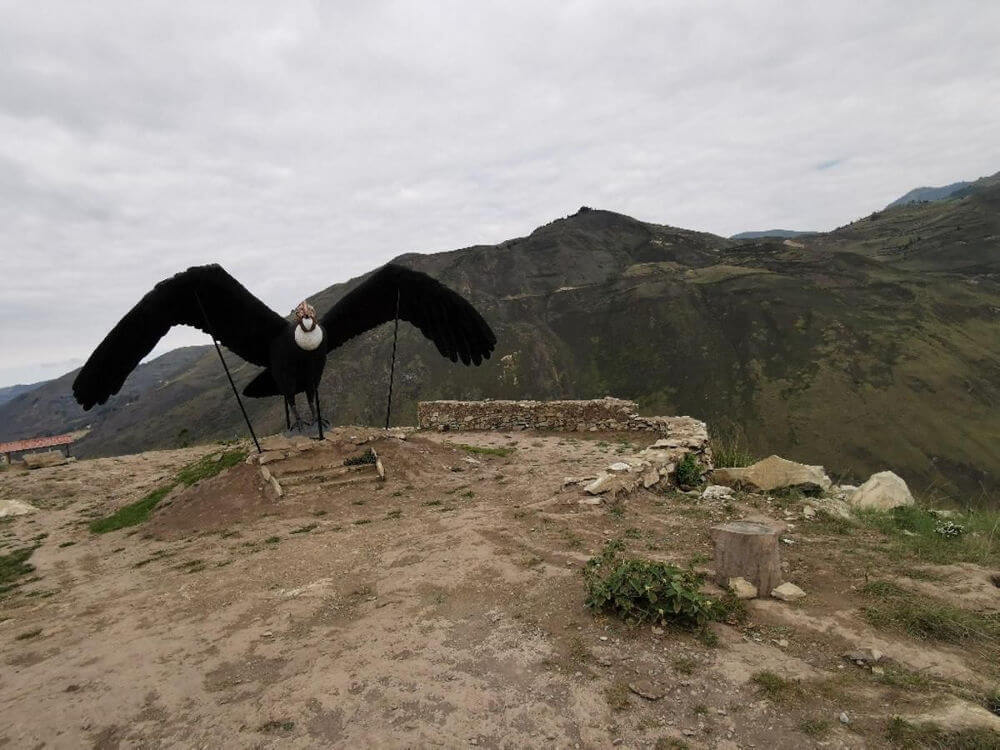
When you reach the end of the ridge, you’ll see a big condor statue. There will be a stone wall (pictured), and you’ll have a view of the railway tracks (and Sibambe train station) below. IMPORTANT: The trail continues downwards, but for this specific hike we’re suggesting, you’re going to turn around and hike the length of the ridge back to where it started at Step 9/10.
Picture 13/Step 13:
Remember the little rock fence/wall from Step 9? Once you’re back here, you won’t cross over but continue to the right, all the way to Nizag.
Picture 14/Step 14:
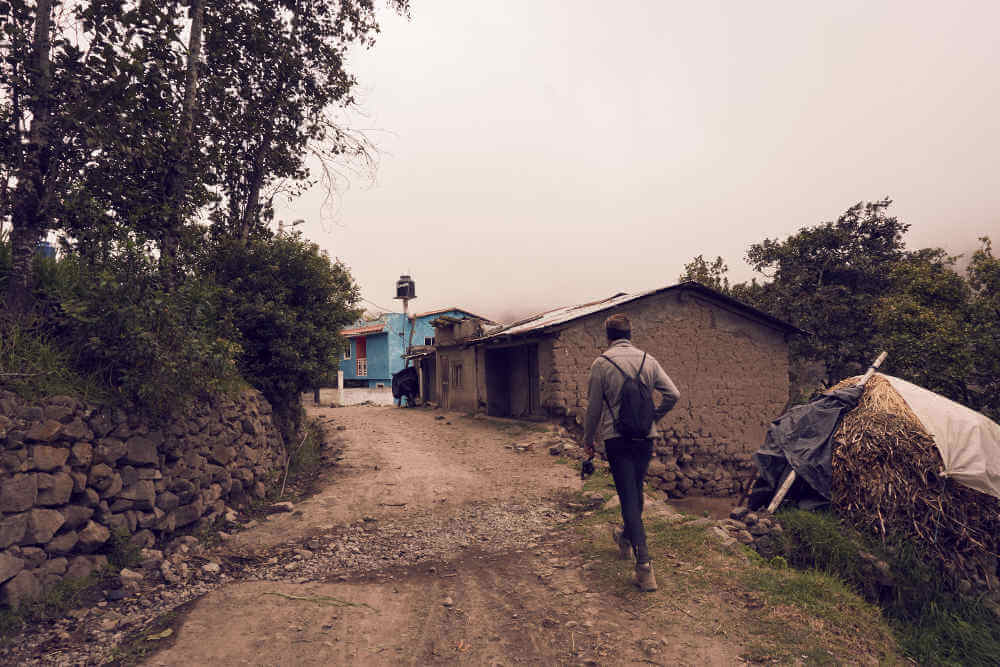
This is the entrance to Nizag! From here, you’ll ask around for a ride back to Alausi. Commercial trucks are usually in the area and are always willing to take people back to town. Many Nizag community members are constantly going to and from Alausi, so hitching a ride shouldn’t be a problem! They usually charge 50 cents per person.
The city is going to charge a small fee to visitors hiking the trail.
We will update the article when we get new information about that fee.
FAQs
How difficult is this hike?
We consider this a beginner’s level hike. The terrain is easy, there are no technicalities, all you have to do is follow our route! The one thing that might make it somewhat of a challenge is if you haven’t yet acclimated to the altitude.
How long does it take?
The entire route, Step 1 to 16 (from Community Hostel Alausi to the end of the Devil’s Nose mountain, then back to the beginning of the ridge and all the way to Nizag) is 2-3 hours, depending on how fast you’re walking. It also depends on how many stops you take along the way to take in the views. Not factored in here is the time it’ll take to hitch a ride back to Alausí from Nizag. The ride itself will take about 20 minutes.
What time should I start the hike?
Ideally, you should start this hike around 7:30 – 8:00 a.m. This will allow for some great views as the clouds clear the way, and you can be back in Alausi just in time for lunch.
What should I take with me?
Good walking shoes (they’ll also get pretty dusty), sunscreen, water, and cash (simple change) for the ride back. If you want, you can take a snack to have when you have reached the end of the mountain. Also, a copy of this guide (or screenshots!)
Do I need money for anything?
The fee for visitors hiking the trail is $2 (see step 10).
The ride back to town, should be about 50 cents.
There is absolutely no charge for anything else.
Do I have to go to Nizag, or can I just go back to Alausi the same way I came?
You don’t have to go all the way to Nizag, you could just go back to Alausi along the same route, but we highly recommend going.
Is it safe to go by myself?
It is very safe. This is a small, tight-knit community and you’ll feel that right away! Locals are also very helpful, so ask away if you have any questions or need any guidance from them.
Do you like hiking? We have ssome more information about hiking in Ecuador.
Thanks for the great article about hiking the D. Nose but I have to say that it is not accurate any longer. The road has changed and steps 6 & 7 are completely gone. Since your article comes up first in looking for hiking info can I recommend you update it or remove it so as not to mislead people.
We tried to follow it today and got a bit sidetracked before using Mapsme app to figure out the right way.
Cheers!
Tim
Hi Tim, thanks a lot for your comment. We changed the text.